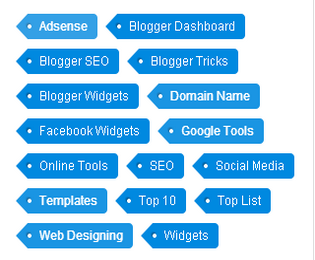
Customize Label Widget brings more beauty in blogger blog. It will make our blog more attractive and designable. We know that by default blogger cloud label widget looked ugly and unprofessional however, if we add some piece of code to style sheet then it could become an eye-catcher for readers & make our blog design lovely. This widget is mostly appeared at the right side of the blog which consist of several labels. Today we will present an awesome
blue color cloud label widget which we have personally implemented on PBT. Since from a long time we have received budles of email from reader to share the PBT labels widget with us. So in today article we will share with you
customized label widget for blogger.
Label Widget For Blogger
Well guys you all of know that every blogger use label widget in blog to navigate or jump from one category into another without search any post by Search Engine. This widget help us to show all the related posts of the same category by single button. So we could easily click on desire niche label to view all the posts of related topics. So in this way we can findmultiple posts of the same topic with single label button.
In official term it will be defiened by Muhammad Waleed like this way.
A label widget is an automated and official part of a blog which can be interlinked and hold bundles of posts with a single tab to find multiple posts easily of the same category.
How To Add Customize Label Widget In Blogger Blog
Here is all the beginner steps that you will learn how can we apply any Css designing to labels widget.
- Go to blogger dashboard:
- Go to Template>>Edit/Html:
- Now Search for ]]></b:skin> tag
- Past the below given code before ]]></b:skin> tag


.label-size{
margin:0;
padding:0;
position:relative;
}
.label-size a{
float:left;
height:24px;
line-height:24px;
position:relative;
font-size:12px;
margin-bottom: 9px;
margin-left:20px;
padding:0 10px 0 12px;
background:#0089e0;
color:#fff;
text-decoration:none;
-moz-border-radius-bottomright:4px;
-webkit-border-bottom-right-radius:4px;
border-bottom-right-radius:4px;
-moz-border-radius-topright:4px;
-webkit-border-top-right-radius:4px;
border-top-right-radius:4px;
}
.label-size a:before{
content:"";
float:left;
position:absolute;
top:0;
left:-12px;
width:0;
height:0;
border-color:transparent #0089e0 transparent transparent;
border-style:solid;
border-width:12px 12px 12px 0;
}
.label-size a:after{
content:"";
position:absolute;
top:10px;
left:0;
float:left;
width:4px;
height:4px;
-moz-border-radius:2px;
-webkit-border-radius:2px;
border-radius:2px;
background:#fff;
-moz-box-shadow:-1px -1px 2px #004977;
-webkit-box-shadow:-1px -1px 2px #004977;
box-shadow:-1px -1px 2px #004977;
}
.label-size a:hover{background:#555;}
.label-size a:hover:before{border-color:transparent #555
transparent transparent;}
Finally Click on save button & you done almost:
This is a short description in the author block about the author. You edit it by entering text in the "Biographical Info" field in the user admin panel.
 Customize Label Widget brings more beauty in blogger blog. It will make our blog more attractive and designable. We know that by default blogger cloud label widget looked ugly and unprofessional however, if we add some piece of code to style sheet then it could become an eye-catcher for readers & make our blog design lovely. This widget is mostly appeared at the right side of the blog which consist of several labels. Today we will present an awesome blue color cloud label widget which we have personally implemented on PBT. Since from a long time we have received budles of email from reader to share the PBT labels widget with us. So in today article we will share with you customized label widget for blogger.


0 comments:
Post a Comment